Tuesday, October 25, 2016

Burying the Evidence of Shoddy Brickwork

Now that my oven dome is cured (water all driven out), it’s time to put on some insulation. Basically, I need to bury/cover the dome with a 5 to 7 inch thick layer of perlcrete. Ideally the perlcrete should be a 10:1 mix (10 parts perlite and 1 part cement) for the dome insulation.

In many ways, it was a good thing that I needed insulation over my oven build...didn’t want someone wandering by that knew about brickwork...or more importantly point out how much I still didn’t know about laying brick. Creating an insulation coat of perlcrete over the entire oven sounded pretty easy at the time (and a great way to hide/bury the evidence of my shortcomings as a brick layer). As with all my projects, once again, I was able to make the job more difficult than it needed to be.

I decided that in order to make a consistent thickness of perlcrete over the oven dome, it would be a good idea to use wire mesh placed over the dome at a set distance. When I laid on the perlcrete, I could keep the thickness of the insulating layer fairly even just by keeping the wire in the center of the layer. Subsequent methods by Gulf & UtahBeehiver (Forno Bravo forum) would have been much better, but this worked for me at the time.

First, I built quite humorous (and flimsy) forms around the oven perimeter using bricks and wood scraps. I poured a 3-4 inch thick layer of standard redi-mix concrete a minimum of 4" out from the oven base and then embedded wire mesh into the concrete. When the concrete set, I cut, shaped, formed, and secured the wire over the dome. I was pretty happy that this wire mesh would give me a good thickness guide and add some strength to the insulation cap. Into the concrete I also embedded a leaning piece of ½" rebar on each of the front opening sides to add a little more buttressing strength for the front arches.


What a pain! The perlcrete does not want to “stack” up the sides of the dome. Some will hold behind the wire, but mostly I put it in place and it falls out of place. In addition, I had read that putting a layer of diatomaceous earth (DE) between the dome bricks and insulation layer would help provide expansion slip (as the dome expanded and contracted during firing/cooling cycles) and actually fill minor cracks in the dome mortar joints. However, that DE layer also kept the perlcrete from adhering in any way to the oven bricks...bummer! I also could not get the 10:1 perlcrete mix to hold, so I backed off and ended up using a 6:1 or 7:1 mix that at least I could work with...just a little frustrating!

Decided that it was really just the vertical, lower half portion of the oven that was the problem...so...leftover plywood to the rescue. I set pieces vertically along the base of the oven and then I could simply drop the perlcrete into the space between them and the sides of the oven. The wire mesh didn’t seem to impede the perlcrete as it was dropped down and the loose insulating perlcrete mix appeared to encase the wire nicely as it filled the gap. Once I got to the portion of the oven where it started to “dome” significantly, the perlcrete finally would stay in place. With this technique, insulating the oven dome went quite a bit faster...until of course we ran out of perlite and were due to head out on a trip.

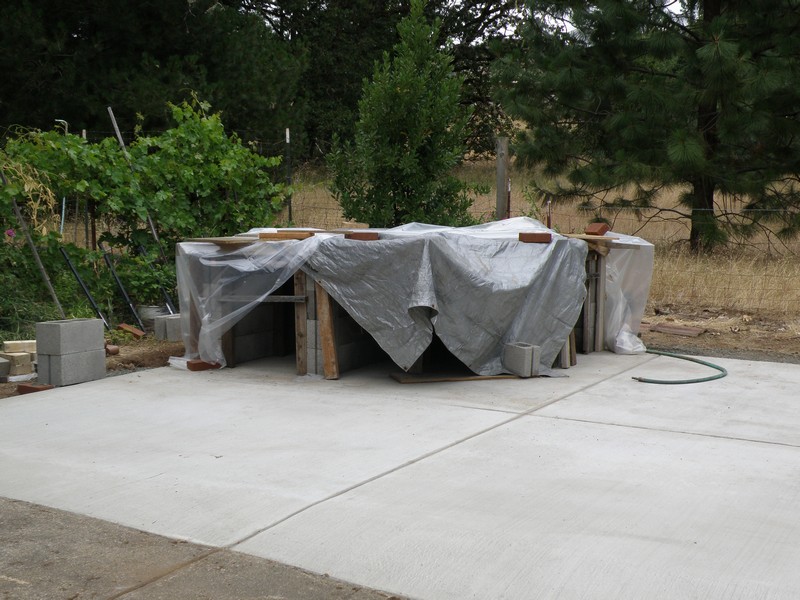
Oh well...I set up a canopy again to keep the rain off and figured the perlcrete would just dry and cure until we got back from our trip...but right now, I need a beer!


Thursday, October 20, 2016

Starting the Cure

Final oven specs - 19" wide opening, 11.75" height, internal 20" high, 39" widest internal, depth is 42" (cooking door brick inside edge to rear wall), 11" inside entry brick to edge of ash slot, 3.5" x 22" ash slot, and door height to dome height ratio = 59% . (My original target for the opening/dome height ratio was the “prefect” 63% ratio, but additional 0.75" at opening height was not in plan specs–I think, along with others, that the 63% is a guideline and the igloo/Montreal/beavertail style shape changes the flow dynamics. Bottom line is that when I fire it up I’ll find out in a hurry about if all’s well.)

After cleaning up the area and returning the tile/brick wet saw to our neighbor, we decided to make our first curing fire into a party. So, mid-morning on September first we made a few calls to friends and folks involved in the building process to the initial lighting of the oven. After dinner about 7:30 pm, we poured a little White Lightnin’ on some newspaper and put a match to it while our dozen guests watched (and I’m sure wondered what the big deal was...). I fed the fire an occasional twist of newspaper to keep some flames going and after about 30 minutes the dome was registering about 200F (IR gun reading). No problems showed up and the chimney/vent system seemed to pull the smoke up & out just fine.


I’d made some whole wheat bread in the house oven, sliced it up into little strips and put them on a baking sheet. Added salt & pepper, a slice of pepadew sweet pepper, plus a few shavings of Parmesan drizzled with EVOO and put ‘em back in a 425F oven to crisp up a bit and meld the flavors. Brownies for a sweet touch of dessert and our first WFO party ended after a couple hours and a lot of laughs (and obviously no pizza).


After a week of gradually increased firing times & heating of the oven, I got a center top section that started to turn “white” where the soot burned off (~700-800F). Continued for several more days bringing the oven chamber up to high enough temperature to clear the soot off the inside surfaces. My cooking floor bricks were the last to come up to temp...I’m sure it was because the perlcrete was still getting rid of the last of the water in that bottom insulation layer. Several little cracks open up on top of the dome during firing...pretty small and fairly normal from what I understand. Initially when the oven curing process started to actually expand the dome, those cracks would be steaming. Amazing how much water needed to get driven out of the bricks, mortar, and hearth insulation during the curing process.

Sunday, July 24, 2016

Going in for the Landing

Now that the dome is complete, I’ve got to create the landing area in front of the oven maw and the chimney system. The landing area will be just in front of the ash slot and the ash slot will be underneath the chimney. There will be a lot of weight on the front arches with the chimney, so I’ll be adding some fairly solid buttress components on the front sides.

I did a dry stack on the sides to get an idea of final heights for base of the chimney “arch” support. I then cut some concrete block and laid it on the oven platform in front of the ash slot and across the front span of the oven. Next I mortared bullnose bricks across the top for my landing.


I built up the sides of the oven front entrance to the point I wanted the arch to start. Once the bullnose bricks were mortared in, I took common brick and laid it to provide some significant lateral/buttress support. Being an overachiever, I also ran a pieces of rebar down through the brick holes and mortar to help keep the side mass from shifting. With the sides now solid, I laid out two brick arches that would span the entry. The back arch was made of firebrick and the front was made with common reds. In looking at my completed arches, I concluded that 1) not only am I spatially challenged, but apparently I have trouble making things square and 2) as a total brick novice, I shouldn’t have been doing the final arch work (my first) by flashlight.


So after the mortar had set on the arches, I concluded nobody but me would know how bad it looked (...hmmm, then why did I take these pictures and now post them?) I next started creating the smoke gathering chamber that leads into the chimney. The template to create this flue “throat” was something I saw in the Forno Bravo forum. It involved cutting two sections of 8" diameter clay flue pipe at an angle and joining them together. The result was a section of flue that was wider at the bottom than it was at the top. The joining at the top was back to the original 8" diameter. This throat piece was mounted on top of my entry arches and serves as the smoke collector for the oven’s upper chimney segments. I laid firebricks across the top of the entry arch sides, joining with the throat piece at the apex. Thankfully, the buttressing I had added on the lower sides of the arch did their jobs and the oven’s chimney system is still standing.


With the oven landing and chimney arches set and the lower throat piece of clay flue section in place, I was ready to build up the oven front. Brought up the sides and the arches to form a level top and "pleasing" front. Put a chimney cap with cinder/ash screening in place and decided it was time to start curing the oven.


Again, it's good to know how many novice errors can be covered up with a little effort "up front".

Sunday, April 24, 2016

Trusting the structure of a masonry dome (you’ve built...)

No matter how much you read about the strength and stability of a dome construction, it isn’t until you actually walk inside something like the Pantheon in Rome that you appreciate the incredible forces involved. Considering that this particular (and huge) Roman dome was built over 2,000 years ago and yet still keeps tons of rock “hanging” above your head without any seeming support is what I consider a miracle of construction. That said, when I cleared out the supporting materials under my WFO’s completed dome I was really cautious/fearful of putting my head into the oven. While knocking that first support out, I actually stood off to the side in case the oven collapsed (after all, I'm not Roman).

Turns out, the structure and design of a dome is something that even someone with no Roman ancestry or masonry experience (such as moi) can create successfully by following a few simple instructions. When I cleared out the sand from the oven chamber, I was struck not by hundreds of falling firebricks but simply by the high humidity of the interior. It didn’t take long for it to sink into my beady brain that the dome was not going to collapse or shift in any significant way. It was an incredible relief to finally believe my oven was really going to work as an oven and not become a final monument to my ineptitude (while doubling as my tomb with the poignant, yet simple inscription, "Here Lies a Dome Builder Who Should Have Stuck With His BBQ").

My plastic covered sand form worked well to help make pretty smooth & consistent angles on the inside of the dome. Just before clearing out the sand trash, I put some thinner concrete blocks along the oven front to raise the outer landing. I needed to raise this area so when I put bullnose bricks on top of them, the bricks would be flush with the inner landing (on the other side of the ash slot). After doing a final inspection & cleaning inside the oven, I started thinking about the building of the front arches for the chimney. In the “putting more than faith inside the oven” picture, note the piece of angle iron across the opening. The bricks forming the outer faux chimney will be laid along this angle iron to get them even & horizontal across the dome's curvature. The actual chimney flue pipe will span the gap between the inner & outer arches while resting on each arch (or so I hope).

As I stood back and collapsed the sand form, I really did
wonder if the structure would remain standing.
As I cleared most of the plastic bags and sand from the oven
chamber, I was pleasantly surprised to note that;
#1 The dome was still intact and #2 The dome inner surface
didn't look half bad...some people might just be polite and
say "Well, it is unique..." 

This is looking up at the dome roof. The bottom
right is pointing towards the front opening.
Again, this short beavertail design of the dome
is most apparent when looking from the top
or bottom of the oven's dome.


It was more than a little intimidating crawling into the oven
  chamber the first time...all the while I was wondering if I'd
applied the mortar properly. Apparently my wife was
thinking, "Well, if we can't afford cremation, I'll
know we can DIY the job here".

Saturday, April 23, 2016

Closing in...

As I started laying bricks by myself, I realized that the more difficult job of putting the bricks into increasingly vertical position was all mine...oh, joy! The options I found at the time included filling the oven with sand or a large exercise ball. I compromised and made a plywood platform just below my current brick course. On the platform I put a piece of Styrofoam that was angled slightly out (hopefully to catch wayward sand or mortar from above). On top of the Styrofoam went plastic bags full of sand and then some loose damp builder’s sand. The plastic bags would make it faster to clean up when the dome was closed and the loose sand allowed me to properly shape the dome ceiling. After I added the first chain on the sand, I started worrying about the sand sticking to the mortar and making for a difficult cleanup. Based on that thought, I laid a piece of plastic over the sand form to keep the sand and mortar separate. (Yes, that is a bag from the original SPAM museum in Austin, Minnesota.)

Now almost everyone that builds a masonry oven at home uses a variation on what’s called (at least on WFO builder sites such as Forno Bravo) the Indispensable Tool (IT) to place these "hanging bricks". Either I missed the IT (probably the case) or the idea became the defacto standard after I was past this point in my build (another one of my mental outs to avoid responsibility for doing something else the hard way...).

Anyway, I cut and laid the remaining bricks to close in the dome pretty quickly. I cut several sequential bricks, numbered them and laid them on the domed, plastic covered sand form. When I had enough cut to justify opening up the bucket of ‘Sairset high-temp mortar, I gave the bricks a quick dunk in water and mortared them into place. Because my dome had the “teardrop” shape, some of the bricks were a bit challenging to cut & fit...but I figured that was part of my penance for wanting to build my own WFO.

Being spatially challenged (and running out of bricks to cut incorrectly), I was very glad a friend came over to help cut & set in the last chain and the two part keystone. I freely admit that my adult beverage that night tasted especially good and felt quite well deserved.

No, it's not the proto-type for Stonehenge.
It's my platform for the sand dome form...to help set and
support bricks in place until the mortar grabbed. 
Sacks of sand on the Styrofoam platform were covered
with a layer of damp builders sand. The sand was then
shaped and smoothed to act as a form for the dome bricks.

The sand form worked, I just had an anxiety attack about sand
sticking to the brick mortar and added a piece of plastic to
separate them. Note that the bag is from the SPAM museum.

A fair bit of challenges here for my inability to spatially visualize
how to cut the angles for the top several brick courses...but I just thought
that with enough mortar nobody would ever see how ugly it really is.

With the help of a friend (who isn't spatially challenged), I got the
final set of bricks cut that were my keystone for the dome.
Time for an adult beverage and self-congratulations.

Wednesday, April 6, 2016

Finally, the Oven Build Begins

I’m pretty patient, but waiting for the top slab to cure was pretty difficult. I removed the rickety form the day after the pour. The concrete was indeed smooth where it had been poured on the plastic covered plywood. Turned out I was very lucky that not only had the concrete stayed in the fragile form but removing the form in most places was pretty easy...it literally fell out of a couple of places. I tried to remove the ash slot void form, but it didn’t come out. I figured that I’d better wait for a full cure before I tried any brute strength techniques to remove it. I sprayed the concrete with water every day and kept it covered to make sure I got an adequate cure before continuing.

While waiting for the slab to cure, I had tried several brick patterns on the hearth mock-up. Although I liked the offset pattern, I’d seen several online recommendations for a herringbone design. The herringbone just looked a little intimidating to me.

After a week, I decided I could remove the ash slot void form and put the insulating pad/slab on top. From my mockup, I determined that I would need an insulation pad about 55" deep (from the oven edge of the ash slot) and about 45" wide. I found that the 2x4 ash slot void was almost impossible to remove. The wood had absorbed water and swollen considerably. I thought I could beat it out with a hammer...not! Next I tried drilling holes to weaken it enough to beat out...not! Ended up drilling, chipping, and beating the 2x4s for about an hour before finally getting it removed. Slot turned out nice, but I’ll always use foam for any future void form I may need in a concrete job.

Built another form on top of the slab for the perlite/cement insulation layer. This perlcrete would be mixed in a 5:1 ratio (by volume). The reason I used perlite is that it was pretty cheap ($12.54/bag) at the place where I got my block & firebricks and the each bag contained 4 cubic ft. I added five buckets of perlite into a wheelbarrow and one bucket of cement. I mixed the two dry ingredients together first and then slowly added water. The materials are pretty weird and you have to be careful to do more of a folding motion with the shovel. When I’d added enough water that I could take a handful of the mixture, squeeze it, and have it remain in a single lump--I was done. I used a bucket to transfer the perlcrete up into the form. I needed a little over that 4 cubic foot bag to fill the form, fortunately I had purchased a second bag...

I tapped the sides of the form and screed out the top level. After a day, the perlcrete had started to firm up, but it seemed too crumbly around the outer edges to remove the form. My brother-in-law (with actual masonry experience) stopped by and thought the perlcrete had been a bit too dry when I’d mixed it. So, we dug out about an 1"-2" along the form edges and refilled with a slightly wetter mix (still 5:1) which cured with much better “firmness”.

Mark, my brother-in-law, and his wife were willing to stay with us for a few days to help me get the hearth and some of the brickwork done for the oven...talk about relief! I spent quite a bit of time showing him pictures of WFOs and we talked quite a bit about they worked and what I wanted for this one. After he had the basic concepts down, we went out the garage and he discovered I had no masonry tools, so off to the hardware store to pick up several types of trowels, sponges, and some wooden wedges--I do enjoy shopping. Borrowed a 10" wet saw from a neighbor. Ended up getting a new diamond blade and a new belt to get it working to cut our firebricks.

Mark first set & leveled damp builders sand on the cured perlcrete pad. Next he started laying out and leveling the hearth bricks. It was easy for him to do the herringbone pattern and I’d recently read that it was best because it wouldn’t catch the edge of your pizza peel. We did a dry run for the layout of the oven chamber base. I wanted a short beavertail design so that I could easily pull out the coals and ash into the ash slot. This design also let me more easily access and use all of the hearth area. Once we’d both agreed on the layout, he started to show me how to properly set the bricks. We used ‘Sairset pre-mixed high temperature mortar and did not taper any bricks. I had read it would only take one, 5 gallon bucket for the oven...but by the time Mark & I had finished the fifth chain/course of bricks, we had emptied 3 buckets of ‘Sairset. I wish I had found the home-made high temp mortar info on the forum before I finished the build.

Mark & his wife had to leave us after finishing the fifth course, but he’d made sure that we’d talked about setting the chimney/flue placement. So, I guess I’m back on my own again...but now I actually think I know what I’m doing.


Wednesday, March 30, 2016

A Form to be Reckoned With!

8-10 July 2009 – As I mentioned in the previous post, I was using scrap/crap wood to make the top oven slab form. Being basically cheap, I had scrounged pieces of wood to make the form not realizing what a critical part of cement work it is. I cut several pieces of plywood to act as a form bottom for the areas over the bays and the front span. Again, I jammed some scrap wood under the plywood and figured that was all I’d need to support the concrete poured on top. As you can see, the form was better suited to a load of packing peanuts. I was really lucky that the poured concrete did not collapse my rickety form while it was fluid & curing. It was a real heart stopper when I experienced the force that a yard of concrete can exert pushing out when poured into a form...again, I was really, really lucky I didn't end up with a big mound of concrete where my oven stand was supposed to be. I now appreciate when I see someone has installed a strong, braced form for ANY concrete work.

To back up a little, I had decided that I wanted to include an ash chute into the build. I didn’t want to be shoveling out the oven (or hauling ash & coals around) when Susan was setting a dinner table. Being able to pull the ash into a container to be dumped later (after the party) seemed a good idea. I researched and found that if you put a solid block of something into an area to be filled with concrete, it’s called a void form. Once the concrete hardens, the void form is removed and surprise...there is a “hole” in the concrete. I took two pieces of 2x4 the length of my projected oven opening, nailed and glued them together (what an idiot, over-achiever I was on that) and wrapped them in plastic. A couple of screws up through the plywood base piece and the ash slot was ready for the pour.

I used 3/8" rebar on the main slab and ran a couple of ½" rebar pieces paralleling the ash slot void form. I figured since the ash slot would be in the front span, a little extra strength wouldn’t hurt. I also had a couple pieces of angle iron and I simply laid them along the front edge of the span and over the left bay. The rebar was bent 90 degree into alternating holes of the side-wall blocks. These block holes would be filled with concrete, tying the sides into the top slab with not only concrete but rebar. The other holes were simply filled with crumpled newspaper and cardboard to keep out concrete...no need to fill all the holes.

As I mentioned in the FB forum, I attempted to mix all the cement myself for the top oven slab and alternate block holes. Two batches, two bags of ready-mix cement each and I realized that there was no way on earth I would be able to complete this job before things started seizing up.

In retrospect, one of the smartest things I did in this entire project was to call the local ready-mix delivery truck and have them bring me out a yard of concrete. Fortunately there was a truck available and he arrived before noon. I think he was quite amused with the form I’d built, but was really helpful and we got the slab poured. He showed me how to scree and float the slab so it was finished pretty nicely. It was interesting that this man said he remembered our house foundation was one of his first jobs...almost 40 years ago...wow!
The cement delivery driver was great and really helped a lot.
I especially appreciated that he didn't just stand back and laugh.
After the scree and float, the top slab actually looked good.
It truly was a marvel that the form actually contained the concrete!
Covered and waiting for the cure...

The Oven Stand, Time to Dry Stack and Ponder Options!

While keeping the foundation slab moist as it cured, again I hit the books, the Forno Bravo forum, and the Internet. Confirmed, yes I’d really love to build a white oven, but the black oven was going to be much more realistic for my limited brick & mortar skills. I reviewed my downloaded FB plans and started figuring out my materials list. I am not good at visualizing details, so I picked up some concrete blocks and started to layout what would be my oven stand. I really never liked the “dark hole” used for wood storage under a lot of the ovens that I was seeing so Susan & I came up with something different that would give us some serious flexibility for storage and work surfaces...carts that rolled in & out of bays in the oven stand’s block base.

I talked to the welding instructor at Umpqua Community College where we worked and he said that building the bay carts would be a great project for one of his second year students. I’d have to wait until the oven stand was completed to get the measurements...but at least that part of the plan appeared to be a go.

I worked a bit more on the dry stacking for the oven stand until I felt I’d gotten the best fit for the foundation slab corner. Being basically cheap, I scrounged pieces of wood to make a form for the concrete top of the stand.

Note: When you dry stack block, you obviously will have a shorter stack than when you mortar that same stack of blocks. Not a big deal, but it can be significant! Just be aware that normally you will be adding about 1/4" with each mortar layer. So, mortar a stack of 4 blocks on a slab and it will be up to an 1" taller than a dry stack of 4 blocks...just saying, be aware!

Bought some block and started laying out possible patterns for the stand.
Placed a skimpy model of the oven footprint to check supports.
Decided on this design with two built-in cart bays and a central
block support for the main oven dome.

Finished the stack and added a piece of plywood to keep concrete
out of the back oven stand void. That plywood will be there forever.

Tuesday, March 29, 2016

Decisions, Decisions, Decisions...Corner Build with a Black Oven in the Pompeii (Dome) Style

I really wanted to build an oven like I’d seen in a little bakery in Victoria, British Columbia named Fol Epi. The custom oven was built by the current owner and head baker Cliff Leir and shop opened in 2009. Fol Epi’s “heart” is a large, white oven (designed with the firebox outside the cooking chamber) and their breads were the best I’d ever tasted. Victoria also has the Wildfire bakery (originally opened by Leir using another oven he built). Wildfire is also a bakery experience not to be missed–the remarkable white oven there is just what you’d expect to see in Europe in the late 1800's.

The main advantage of a white oven over a black oven design is better temperature control over long periods of time. Unfortunately, the price you pay for that long controlled bake is a  significantly higher build cost and a much more complex design (read difficult). Again, facing my obvious lack of brick & mortar skills (K.I.S.S. – keep it simple stupid) and recent retirement (read lower income), a black oven made more sense for us. If you are interested in white ovens, take a look at those two bakery web sites (below) and if you get a chance, visit Victoria and try baked goods from both Fol Epi  http://folepi.ca/about/  and Wildfire  http://wildfirebakery.ca/

Note: Do a Google search on Wood Fired Oven Bakeries and you’ll find there are many active WFOs in the artisan bread world....and all seem to be doing quite well. It is a special niche and compared to the mainstream commercial bakeries, they are really in the minority...but every one of these WFO establishments is run by people who love what they do and who are making phenomenal breads every day. Seek them out and sample their wares...you will always leave with a smile on your face!

Since I had no brick & mortar skills, I decided that a black, Roman style (Pompeii) oven would be more realistic for us/me to build. The Preliminary plans for a corner build oven on a large patio slab were agreed upon by Susan & I over a couple of our favorite microbrews. Based on the available space and my initial research, it appeared that the best size oven for us would be about a meter in diameter. The foundation slab would join our garage driveway aiming to present a seamless look to the addition and provide a clear path between the kitchen and the future outside den. Final excavation by a local contractor was completed for an 18'x18' foundation slab on 6/19/2009. The corner triangle (10' on the outside edges) was fitted with extra rebar to have a 6" layer of concrete. The remaining slab are would be 4" thick (with normal rebar). A layer of crushed rock was leveled & compacted into the bottom of the excavation, forms were set, and the concrete was poured & finished on the 24th of June. Instead of being level, the foundation slab was finished with a slight downward slope for drainage...common (and very handy) for rainy Oregon's patios.

Note: At the time I didn’t think about having people/parties in the now “dedicated” space–it seemed huge at the time. Once we'd built an enclosure around the oven and brought a table & chairs in for dining...and a cooling rack for bread...I now wish we would have built a bigger structure.
Laid some bricks out to designate corners of the foundation. Note that
Locator services had marked there were no utility lines in the area.

Excavation complete, crushed rock was compacted as a base. Far corner is
deeper to accommodate a 6" layer of concrete for better oven support. 

Foundation slab was poured and finished with a slight angle so water will
drain off to the right. Forms have been removed and concrete is ready for the build.

Sunday, March 27, 2016

Owning a WFO...Research and Questions

I initially spent a lot of time reading Kiko Denzer’s Build Your Own Earth Oven, but decided that the cobb (clay) oven would be fairly high maintenance here in rainy Oregon. I picked up a copy of The Bread Builders by Daniel Wing & Alan Scott and decided that a masonry, dome oven was our best choice–especially since my main interest was baking bread. An Internet search turned up the Forno Bravo website which really opened my eyes and raised my hopes that even I could build one of these beauties.

It’s been interesting over the years that even though Alan Scott’s designs are no longer recommended on this forum, The Bread Builders book is still a treasure trove of information and terminology for masonry oven history, design choices, construction techniques/terminology, and bread science. If you’re thinking seriously of building an oven, read this book first!

Based on my pre-build and post-build experiences, here’s a list of questions to ask yourself before you actually start on this project. It’s important to find out or seriously consider an answer for each question that is realistic for you and your location.

1) No matter how good you are at hunting down bargains, building a wood fired oven is going to be a significant investment in time and money. Are you (and all directly involved relatives), willing to commit to a long-term project like this?

2) What do you want to bake? Just pizza or do you want to bake a variety of items? Remember that access between the kitchen and the oven needs to be pretty good...tracking mud into the house will not make anyone happy nor will having no place to do prep work for the bake.

3) How much do you want to bake at a time and how often will you use the oven? Is the plan for entertaining often, doing an occasional pizza for two, or looking at semi-commercial oven use?

4) Where will the wood supply be stored? Is it going to be reasonably close to the oven? 

5) Do you have neighbors that might not like the inevitable start-up smoke or the noise of a enthusiastic gathering of friends (and can’t be bribed with an invite to the pizza party or a fresh loaf of bread)? It's worth a little investment of your time to get to know your immediate neighbors and make them aware of your plans.

6) Do you want to bake at all times during the year? Putting a roof over the oven is one of the best long term solutions to keeping the oven dry & available all year long. Even if you have to shovel snow between the kitchen and the WFO, you still can use it to make a pizza or some fabulous bread. Want more of a place to party rather than just a place to cook a pizza or two...consider a screened enclosure to keep the bugs and rain/snow out while keeping an outside experience for a group. From my experience, the 18'x18' Dragonfly Den has a max occupancy of 10-12...less if you are going to work the oven while they are all there and everyone wants to watch or help...size does matter here!

7) Will you need to have a building permit or some other government paperwork for your build or enclosure? When I checked with the building department, I made sure they knew that this was basically a controlled, outdoor cooking fire and I would not be connecting to an existing building, adding water, or power. Those seemed to be the magic words...no permit was required for me.

As I said at the beginning, you need to seriously think about each of these points before buying a bunch of fire bricks or thinking you'll just stack some bricks and have a working oven.

(p.s. If you're living with another person...you better make sure they are really on board with the project! Go over question 1 again with them.)


Saturday, March 26, 2016

Why would you want a Wood Fired Oven in your backyard?

Although the final touches on my Wood Fired Oven (WFO) were completed in May of 2012, I was convinced by several of my Forno Bravo forum friends that documenting the Dragonfly Den build would still be of value...especially if I added comments regarding what’s worked well...or could have used improvement. If you’re interested in an amazing journey into the world of masonry ovens, their builders, and the fabulous food that can be produced in one of these ovens...
join the forum at http://www.fornobravo.com/community/

As I started my documentation project, I soon realized that I wasn’t creating a “clean & clear” illustration of the build that was appropriate for Forno Bravo forum users–my build comments had simply become too extensive for this format. My solution was to split the more detailed build descriptions, rationales, and “insights for an improved build next time” into this Google blog and then develop a simple build thread for the forum.

I hope you find this story of my WFO build entertaining as well as informative (even though it obviously will contain lots of my biased thoughts and opinions). For those of you that just want the basic descriptions and pictures, my forum thread on Forno Bravo is http://goo.gl/rlLuM4

I especially want to express my thanks to Susan (fabulous cook, my best friend, and wife since 1971). Without her support, suggestions, and enthusiasm for this retirement project...I don't think I would have ever been able to bake bread or a pizza in our very own wood fired oven.

Along the way in this build document, my intent is to create pdf versions of sidebars like Recommended WFO Tool List, Suggestions for Large Pizza Party Prep, Baking Bread for the Neighborhood, etc. and make them available on this blog series and/or on my forum thread.

p.s. I've never worked with concrete, mortar, or bricks...and it's a little intimidating!

Mike & Susan at The Dragonfly Den oven with a bread batch.